Once your subscription has been provisioned, Geovonic Connect will send an email to the email address you provided. Click on the link in the email to begin connecting Geovonic Connect to your ArcGIS. At each step of the on-boarding flow, you can click on the video thumbnail to watch a walkthrough of the step.
The on-boarding flow is slightly different for ArcGIS Online and ArcGIS Enterprise. This article is specifically for ArcGIS Enterprise.
STEP 1 – Select your target ArcGIS environment
Choose the ArcGIS Enterprise option and enter the URL for your portal.
The URL will look like: – https://<MY_ORG>.org.au/portal

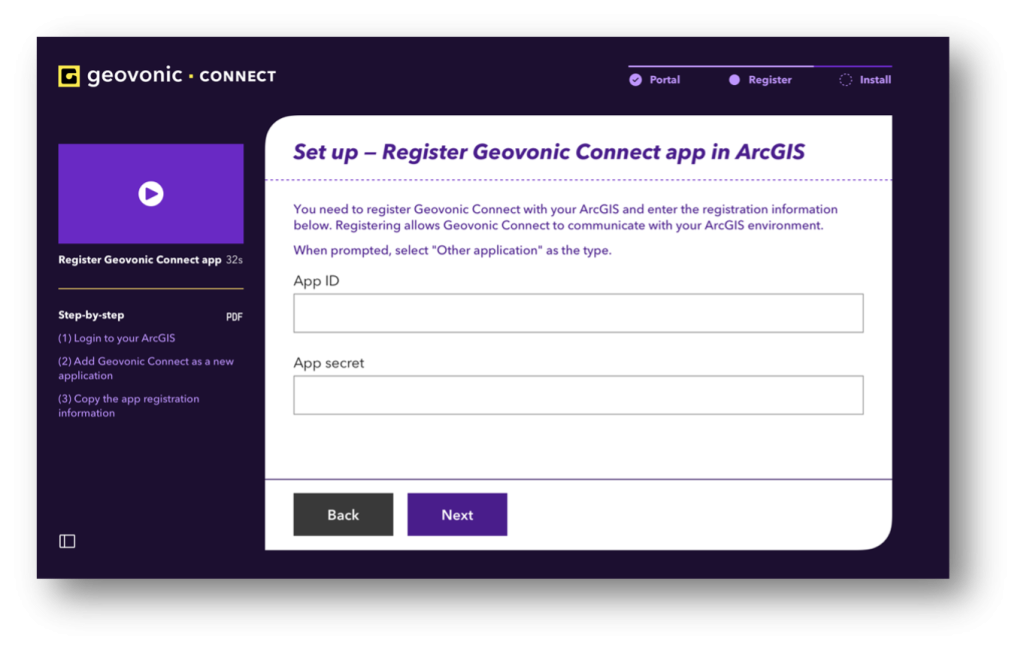
STEP 2 – Register Geovonic Connect with ArcGIS
Geovonic Connect must be registered as an Application within your ArcGIS.
Go to your ArcGIS Enterprise and select your Content.
- Click on New Item
- Select Application -> Other Application
- Fill in the form by entering a name and tags.
- Once the item has been created, go to Settings and go to the App Registration section
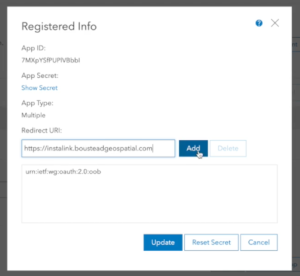
- Click Update to add a new redirect URL. For the URL enter: –https://connect.geovonic.com
- Finally, copy the App ID and App Secret from the ArcGIS into the Geovonic Connect registration form.
STEP 3 – Run the Geovonic Relay Service
Click on the “Install Relay Service” button to proceed to the relay service installation screen.
The Geovonic Connect relay service is deployed within your environment to provide a secure tunnel for routing queries from the Geovonic Connect server to your business systems. For information on installing the Geovonic Connect relay service, please check out this help article.
Once you have got the relay service running, return to the Geovonic Connect admin console where you should see a message telling you that the Geovonic relay service is successfully connected.
STEP 4 – Install widget
The Geovonic Connect widget must be installed in your ArcGIS environment so that it can be included in a web mapping application.
Click on the Register Automatically button to add Geovonic Connect to ArcGIS Enterprise.
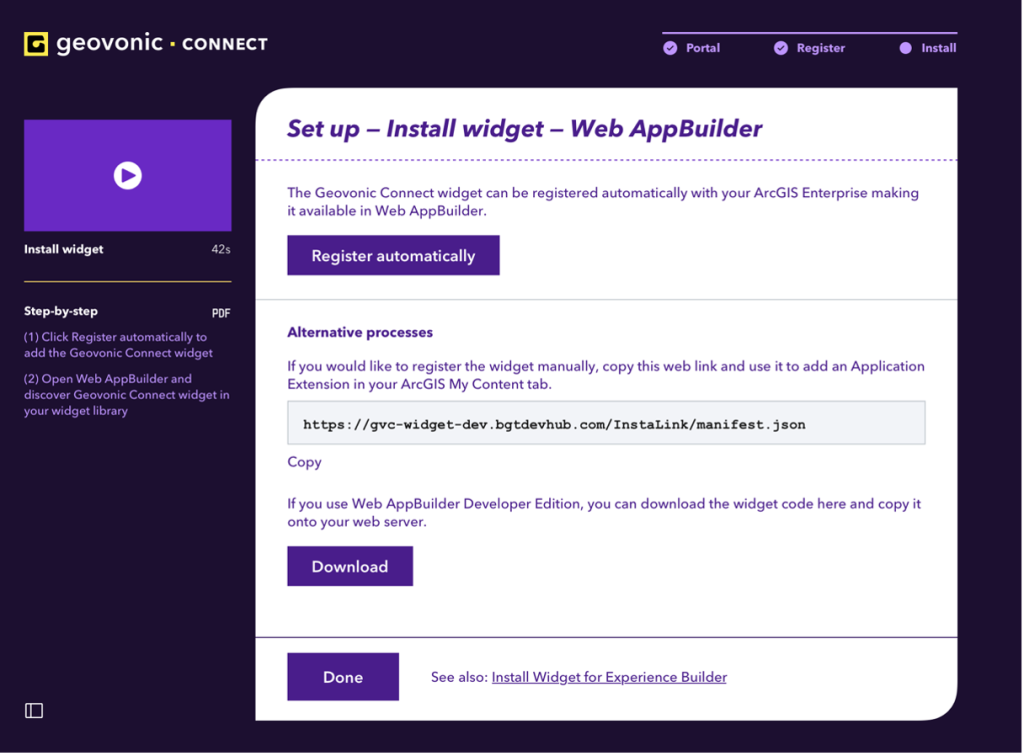
Other options are available for installing the widget either manually or using Web App Builder developer edition.
STEP 5 – Configure Data Sources and Layer Links
Your initial setup is now complete. The next step is to configure data sources and layer links. Please continue with this help article.
Troubleshooting
Unable to login to ArcGIS Enterprise – Invalid redirect URL
Verify that the app registration in your ArcGIS Enterprise portal has been configured with the correct redirect URL.
https://connect.geovonic.com
Cross-origin request blocked
If your browser blocks access to the login page, you may need to add the Geovonic website domain to your allowed origins list in ArcGIS Enterprise.
From organisation security settings, navigate to the Allow origins section and add https://connect.geovonic.com as a new domain.